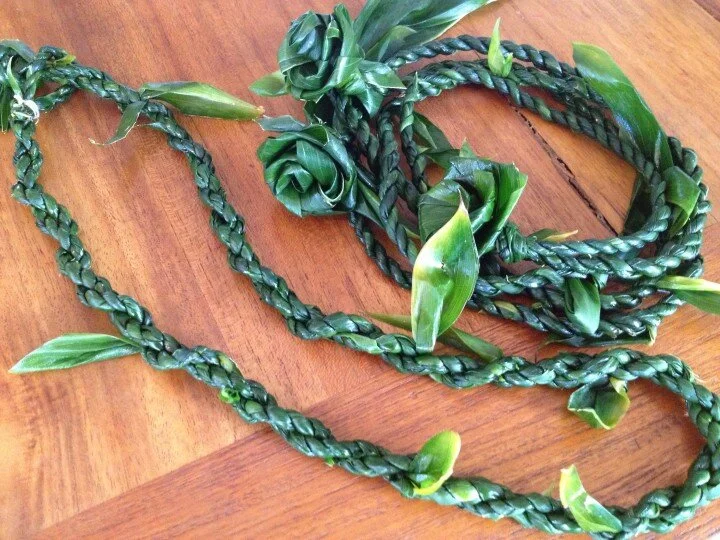
How to make Ti Leaf Lei - Single/Double Strand & Roses!
If you grew up in Hawaii, chances are you’ve made a ti leaf lei. I know I made my share! My mom would have us go pick flowers or ti leaf and make our own – it’s homemade, comes from the heart and… let’s face it, cheaper!
I recently did a shoot with the Travel Channel called the “Top Ten Locals List”… I thought, what’s more local than doing something that most kids do growing up in Hawaii? Making ti leaf lei was my suggestion and I’m so happy that the producer and host agreed to put it on the list!
When you’re on a production like this, time is of the essence. I was asked to prepare all of the lei ahead of time so that the shooting time would be as efficient as possible. Sooooo… I had my hubby film me making them so that I could post a tutorial for my blog – multi-tasking!
Here is the video tutorial…
Supplies Needed:
Ti Leaf (5 leaves per single strand lei)
Scissors
String
Instructions:
1. Pick your ti leaf – Look in your yard or ask a neighbor (I put a post on Facebook and had a bunch of people offer up their leaves!)
2. Soften your ti leaf – There are a number of ways to do this. My preferred way is to put them in the freezer overnight, let them thaw and they are ready. You can also microwave or boil them (makes your house smell like laulau).
3. De-bone the ti leaf – There are also a few ways to do this. As a kid, we split the spine with a knife and then slowly tore it off. It’s a technique you kind of have to master so, I prefer taking scissors and cutting from the top of the leaf and along the spine on both sides.
4. Take two leaves (each “leaf” is now actually just half of one ti-leaf) and tie in a square knot. Be careful not to tear the leaf.
5. Start to wili (twist). I’m right handed so I’ll tell you how I do it. I take the knot in my left hand and I wili one strand by twisting AWAY from me. Then, you take that same strand and pass it OVER and TOWARD you. Take the other strand and wili away from you. Then take that strand and pass over and toward you. Repeat until you get to about 3 or 4 inches from the end of the leaf.
6. To add another leaf simply place the end of a new leaf on top of the old one in the wili – let the new leaf stick out a couple of inches past where you will begin to wili again. Twist same as explained above but this time with both the new and the old leaf in the same twist. (See video if this isn’t making sense)
7. When your lei is the length that you want it finish it off by tying a square knot at the end or tying string around the end. You can leave the lei open (like a maile lei or if being offered to a pregnant woman) or tie it closed. I like to embellish the end by making a rose and tying it to the strand, then making a loop on the other end around the rose to finish it off nicely. “Fix” the ends by clipping off the ugly pieces that stick out and cleaning up the parts that may be brown.
8. Double Strand Tutorial – In jewelry-making class I learned how to do Polynesian roping so I decided to see if the same technique would work on ti leaf. It does! You can take two single strand ti leaf lei(s) and ‘wili’ them together to make a double strand lei that looks REALLY nice


